title: How to Use Qwen-Image-Layered GGUF in ComfyUI - Complete Installation and Usage Guide slug: qwen-image-layered-gguf-comfyui-guide-en description: Complete guide to installing and using Qwen-Image-Layered GGUF in ComfyUI. Learn automatic image layer decomposition, GGUF quantization benefits, system requirements, step-by-step installation, workflow configuration, and practical applications for AI-powered image editing. category: AI Tools tags: ['qwen image layered', 'comfyui', 'gguf', 'image layer decomposition', 'ai image editing', 'image generation'] author: Tech Editorial Team coverUrl: /images/blog/qwen-gguf-comfyui.jpg locale: en status: online
How to Use Qwen-Image-Layered GGUF in ComfyUI: Complete Installation and Usage Guide
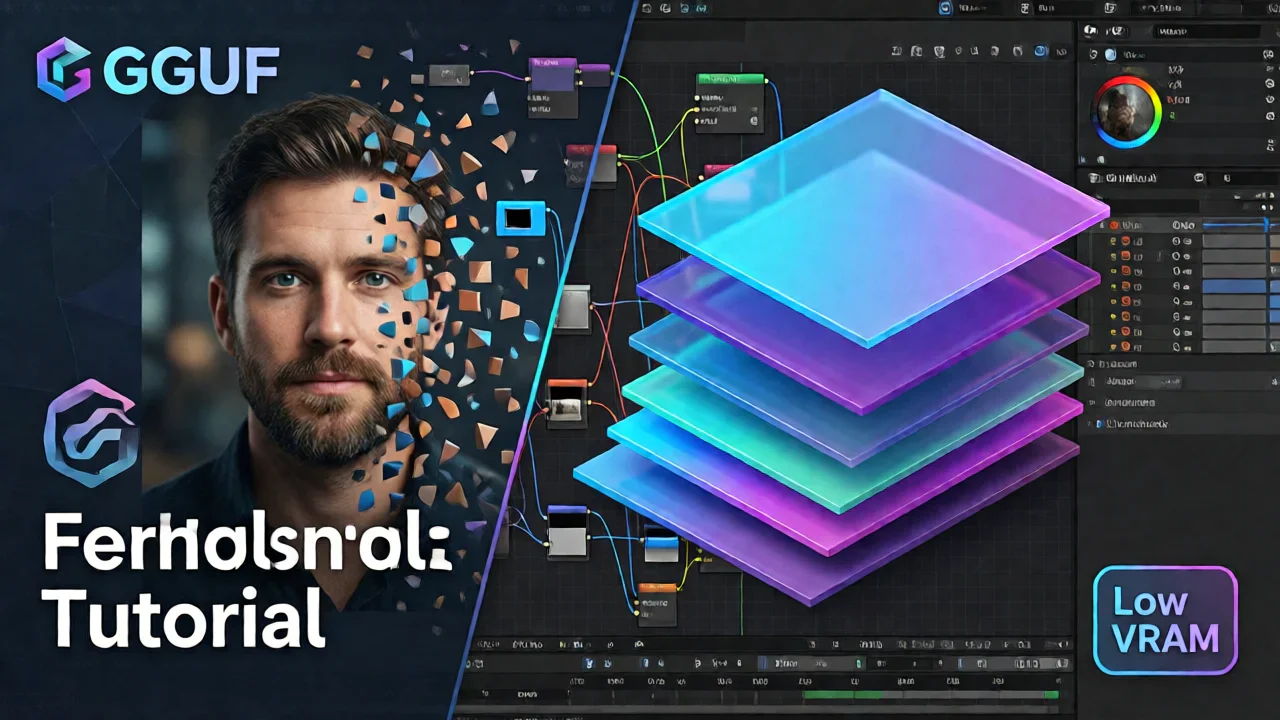
Image editing has traditionally required manual masking, complex selections, and hours of painstaking work in tools like Photoshop. What if you could automatically decompose any image into editable layers with a single click? That's exactly what Qwen-Image-Layered brings to ComfyUI.
Developed by Alibaba's Qwen team, Qwen-Image-Layered is a revolutionary AI model that automatically breaks down images into multiple independent RGBA layers. Each layer contains specific semantic components—backgrounds, foreground objects, text, and decorative elements—that can be edited independently without affecting other parts of the image.
The GGUF (GPT-Generated Unified Format) version makes this powerful technology accessible to users with limited GPU memory. In this comprehensive guide, you'll learn how to install and use Qwen-Image-Layered GGUF in ComfyUI, even if you're working with consumer-grade hardware.
What is Qwen-Image-Layered?
Qwen-Image-Layered is an advanced image decomposition model that transforms flat raster images into structured, multi-layer representations. Unlike traditional image segmentation that only provides masks, this model generates complete RGBA images for each layer, including:
- Background layers with complete scene reconstruction
- Foreground objects with proper alpha channels
- Text elements isolated for easy editing
- Decorative effects and semi-transparent elements
- Occluded regions intelligently reconstructed
The model supports variable layer counts (3, 4, 8, or more) and even recursive decomposition, where any layer can be further broken down into sub-layers. This flexibility makes it suitable for everything from simple product photos to complex artistic compositions.
Why Choose GGUF Format for ComfyUI?
The GGUF format combined with quantization offers significant advantages for ComfyUI users, especially those working with limited hardware resources.
Key Benefits of GGUF Quantization
1. Dramatically Reduced VRAM Requirements
Quantization shrinks model size by 50-75% by reducing the precision of numerical weights. A model that typically requires 16GB+ VRAM can run on GPUs with 8GB or even less when using GGUF quantization. This democratizes access to advanced AI capabilities.
2. Faster Inference Times
Lower precision weights mean faster computations. GGUF's optimized binary format also enables quick loading and saving, reducing startup times and speeding up generation within ComfyUI workflows.
3. Cost-Effective AI Generation
By lowering hardware requirements, GGUF quantization eliminates the need for expensive high-end GPUs. You can run powerful image editing models on consumer-grade hardware, including laptops with integrated GPUs.
4. Flexible Quantization Levels
GGUF supports various quantization levels (Q2, Q4, Q5, Q6, Q8), allowing you to balance model size, speed, and output quality. The Q4_K_M level is frequently recommended as it provides excellent balance for most users.
5. Seamless ComfyUI Integration
Custom nodes like ComfyUI-GGUF provide native support for loading GGUF models directly into workflows. You can easily replace standard model loaders with GGUF-specific nodes, streamlining integration into existing pipelines.
For Qwen-Image-Layered specifically, the GGUF version makes layer-based image editing accessible to a much wider audience without sacrificing quality.

System Requirements and Prerequisites
Before installing Qwen-Image-Layered GGUF in ComfyUI, ensure your system meets these requirements:
Minimum Hardware Requirements
- GPU: 8GB VRAM (GGUF Q4 version) or 12GB+ VRAM (FP8/BF16 versions)
- RAM: 16GB system memory recommended
- Storage: 15-20GB free space for model files
- OS: Windows 10/11, Linux, or macOS
Software Prerequisites
- ComfyUI: Latest version (updated to support native Qwen-Image-Layered nodes)
- Python: 3.10 or newer
- CUDA: 11.8 or newer (for NVIDIA GPUs)
Performance Expectations
Based on real-world testing:
- RTX 4090: Near full VRAM utilization with BF16 version
- RTX 3060 (12GB): Comfortable with GGUF Q4 version
- RTX 3050 (8GB): Works with GGUF Q4 at 640px resolution
- Generation time: 60-120 seconds at 640px, 120-180 seconds at 1024px (50 inference steps)
The GGUF format makes it possible to run Qwen-Image-Layered on hardware that couldn't handle the full-precision version.
Step-by-Step Installation Guide
Follow these steps to install Qwen-Image-Layered GGUF in ComfyUI:
Step 1: Update ComfyUI
First, ensure you're running the latest version of ComfyUI:
cd ComfyUI
git pull
The latest ComfyUI versions include native support for Qwen-Image-Layered, eliminating the need for custom nodes in most cases.
Step 2: Download Required Model Files
You'll need three essential model files. Download them from Hugging Face or ModelScope:
Required Files:
- Text Encoder:
qwen_2.5_vl_7b_fp8_scaled.safetensors(~4.5GB) - Diffusion Model (choose one):
- GGUF Q4:
qwen_image_layered_Q4_K_M.gguf(~3.2GB) - Recommended for 8-12GB VRAM - FP8:
qwen_image_layered_fp8mixed.safetensors(~6.8GB) - For 12-16GB VRAM - BF16:
qwen_image_layered_bf16.safetensors(~13GB) - For 16GB+ VRAM - VAE:
qwen_image_layered_vae.safetensors(~320MB)
Download Sources:
- Hugging Face: Qwen/Qwen-Image-Layered
- GGUF versions: QuantStack/Qwen-Image-Layered-GGUF
- ComfyUI-optimized: Comfy-Org repository
Step 3: Place Files in Correct Directories
Organize the downloaded files in your ComfyUI installation:
ComfyUI/models/
├── text_encoders/
│   └── qwen_2.5_vl_7b_fp8_scaled.safetensors
├── diffusion_models/
│   └── qwen_image_layered_Q4_K_M.gguf
└── vae/
    └── qwen_image_layered_vae.safetensors
Important: The VAE file is specifically designed for Qwen-Image-Layered and handles four channels (RGBA) instead of the standard three (RGB). Don't substitute it with other VAE models.
Step 4: Install GGUF Support (If Needed)
If you're using the GGUF version and your ComfyUI doesn't have built-in GGUF support, install the ComfyUI-GGUF custom node:
cd ComfyUI/custom_nodes
git clone https://github.com/city96/ComfyUI-GGUF
cd ComfyUI-GGUF
pip install -r requirements.txt
Restart ComfyUI after installation.
Configuring Your ComfyUI Workflow
Once the models are installed, you can set up a Qwen-Image-Layered workflow in ComfyUI.
Basic Workflow Structure
A typical Qwen-Image-Layered workflow includes these key nodes:
- Load Image: Input your source image
- GGUF Unet Loader (or Load Diffusion Model): Load the Qwen-Image-Layered model
- GGUF CLIP Loader (or Load Text Encoder): Load the text encoder
- Load VAE: Load the specialized Qwen VAE
- Sampler: Configure generation parameters
- Save Image: Output the generated layers
Recommended Sampler Settings
For optimal results with Qwen-Image-Layered:
- Inference Steps: 50 (minimum recommended)
- CFG Scale: 4.0
- Sampler: Euler or DPM++ 2M
- Scheduler: Normal or Karras
Note: These settings will significantly increase generation time compared to standard image generation, but they're necessary for high-quality layer decomposition.
Resolution Settings
Choose your input resolution based on your hardware and quality needs:
- 640px: Balanced quality and speed, works on 8GB VRAM
- 768px: Higher quality, requires 10GB+ VRAM
- 1024px: Maximum quality, requires 12GB+ VRAM with GGUF or 16GB+ with FP8
The model will automatically resize your input image to the specified resolution while maintaining aspect ratio.
Layer Count Configuration
Specify how many layers you want the model to generate:
- 3 layers: Simple decomposition (background, main subject, foreground)
- 4 layers: Standard decomposition (recommended for most images)
- 6-8 layers: Complex decomposition for detailed images
- Recursive: Further decompose individual layers for maximum control
Optional Prompt Input
While not required, you can provide a text prompt describing the overall image content, including partially occluded elements. This helps the model understand image structure and can improve layer separation quality.
Example prompts: - "A person standing in front of a building with text overlay" - "Product photo with decorative elements and background" - "Portrait with complex background and lighting effects"
Practical Use Cases and Applications
Qwen-Image-Layered GGUF in ComfyUI opens up numerous creative and professional possibilities:
1. E-commerce Product Editing
Scenario: You have product photos that need color variations or background changes.
Workflow: - Decompose product image into layers - Isolate product layer from background - Recolor product layer for different variants - Replace background layer with new scenes - Export variations for online store
Benefit: Create multiple product variants in minutes instead of hours of manual editing.
2. Marketing and Advertisement Creation
Scenario: Update promotional materials with new text or seasonal elements.
Workflow: - Load existing advertisement image - Decompose into layers (background, product, text, decorations) - Replace text layer with updated copy - Swap decorative elements for seasonal themes - Maintain consistent lighting and composition
Benefit: Rapid iteration on marketing materials without starting from scratch.
3. Social Media Content Creation
Scenario: Create engaging social media posts with editable elements.
Workflow: - Generate or load base image - Decompose into editable layers - Adjust individual elements (resize, reposition, recolor) - Add or remove objects cleanly - Export optimized for different platforms
Benefit: Flexible content creation with easy adjustments based on performance metrics.
4. Character and Fashion Design
Scenario: Experiment with different outfits or character variations.
Workflow: - Load character image - Decompose to separate character from background - Isolate clothing layers - Replace outfit layers with alternatives - Maintain character pose and lighting
Benefit: Rapid prototyping of character designs without redrawing.
Optimization Tips and Troubleshooting
Performance Optimization
1. Choose the Right Quantization Level
- Q4_K_M: Best balance for most users (3-4GB VRAM savings)
- Q5_K_M: Slightly better quality, moderate VRAM savings
- Q6_K: Near-original quality, minimal VRAM savings
2. Adjust Resolution Based on Hardware
Start with 640px and increase only if your hardware can handle it.
3. Enable Memory Optimization
In ComfyUI settings, enable: - "Auto-unload models" - "VRAM management: auto" - "Aggressive memory cleanup"
Common Issues and Solutions
Issue 1: "Out of Memory" Error
Solutions: - Switch to lower quantization (Q4 instead of Q5/Q6) - Reduce input resolution (640px instead of 1024px) - Close other GPU-intensive applications
Issue 2: Poor Layer Separation Quality
Solutions: - Increase inference steps to 60-70 - Adjust CFG scale (try 3.5-4.5 range) - Provide descriptive prompt about image content - Ensure you're using the correct Qwen VAE
Why Use ComfyUI Instead of Online Tools?
While online AI image editors exist, running Qwen-Image-Layered GGUF locally in ComfyUI offers distinct advantages:
Privacy and Cost Effectiveness
Local Processing: - Your images never leave your computer - No data uploaded to third-party servers - Free, open-source software - Unlimited generations without subscription fees
Online Tools: - Images uploaded to external servers - Monthly subscription costs - Credit-based systems
Customization and Control
ComfyUI provides full workflow customization, parameter control, and the ability to combine multiple models. However, if you want to quickly test Qwen-Image-Layered capabilities without installation, platforms like ZImage.run offer convenient online access to various AI image generation models.
This can be useful for: - Quick experiments before committing to local setup - Comparing different models and parameters - Generating samples on devices without GPU
Once you've validated your workflow, transitioning to local ComfyUI provides maximum flexibility and control.
Conclusion
Qwen-Image-Layered GGUF in ComfyUI represents a significant advancement in accessible AI-powered image editing. By automatically decomposing images into editable layers, it eliminates hours of manual masking work while maintaining professional-quality results.
Key Takeaways
- GGUF quantization reduces VRAM requirements by 50-75% without significant quality loss
- Q4_K_M quantization offers the best balance for most users with 8-12GB VRAM
- Native ComfyUI support simplifies installation and workflow creation
- Variable layer counts and recursive decomposition provide maximum flexibility
- Local processing ensures privacy, cost-effectiveness, and unlimited usage
Getting Started Today
- Update ComfyUI to the latest version
- Download Qwen-Image-Layered GGUF models (Q4_K_M recommended)
- Place files in correct ComfyUI directories
- Load a sample workflow or create your own
- Start with 640px resolution and 50 inference steps
- Experiment with different images and layer counts
Additional Resources
Official Documentation: - Qwen-Image-Layered on Hugging Face - Research Paper on arXiv - ComfyUI Official Documentation
Community Resources: - ComfyUI Wiki - Qwen-Image-Layered Tutorial - ComfyUI-GGUF GitHub Repository
Start experimenting with Qwen-Image-Layered GGUF in ComfyUI today, and discover how layer-based AI editing can transform your creative workflow.
Ready to try AI image generation? Visit ZImage.run to explore various AI models and workflows, or set up your local ComfyUI installation for unlimited creative possibilities.